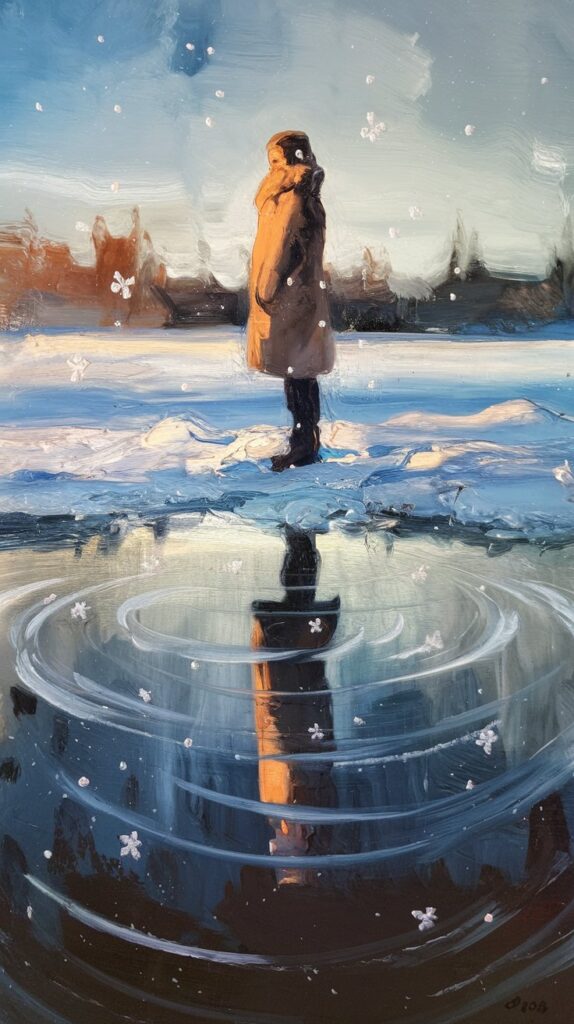
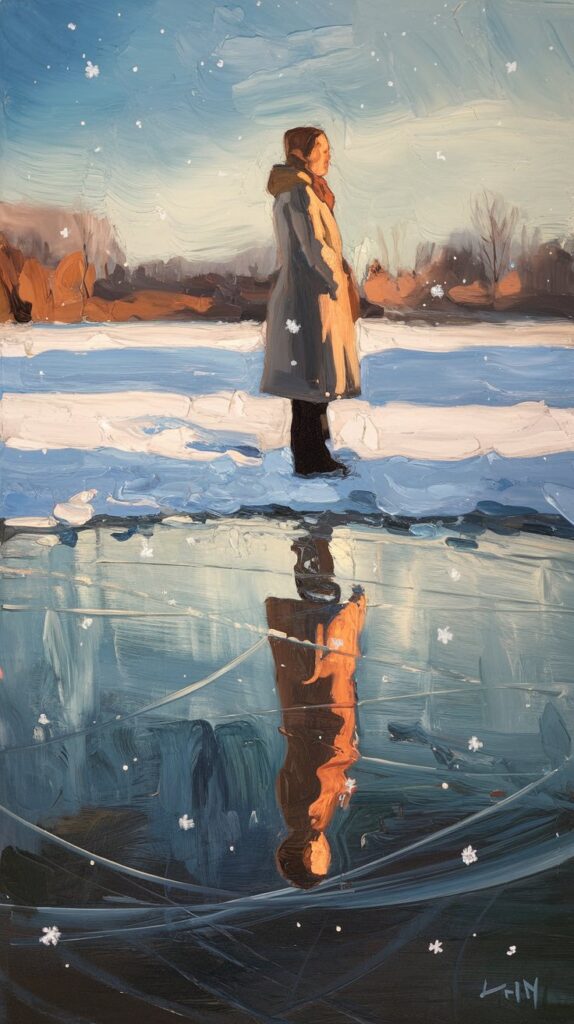
Project Goal: Create a breathtaking watercolor portrait of a figure reflected in an icy, snowy surface, blending human emotion with nature’s winter serenity. This guide includes all the materials, step-by-step instructions, and tips to bring your vision to life.
Materials Needed:
- Watercolor Paper: Arches 140 lb cold-pressed paper – ensures excellent texture and durability for layering.
- Watercolor Paints: Winsor & Newton Professional Watercolor Set, including cobalt blue, ultramarine, burnt sienna, neutral grey, and titanium white gouache.
- Brushes: Princeton Heritage 4050 Round Brushes (sizes 2, 6, 10) and a flat wash brush (1 inch) for washes and fine details.
- Palette: Ceramic or porcelain palette with mixing wells.
- Masking Fluid: Pebeo Drawing Gum – perfect for preserving areas of white.
- Masking Tape: Scotch Artist Tape for clean edges.
- Paper Towels: Viva paper towels for blotting and cleaning.
- Salt: Morton Kosher Salt for icy textures.
- Water Container: Glass jar or sturdy cup for rinsing brushes.
- Pencil and Eraser: HB pencil for sketching and a kneaded eraser for adjustments.
- Easel or Flat Surface: For stable and comfortable work.
Step-by-Step Process
Step 1: Setting Up Your Workspace
- Secure your watercolor paper to a flat surface with Scotch masking tape. Arrange all materials in an accessible, well-lit space.
Step 2: Sketching the Scene
- Lightly sketch the portrait, focusing on the subject’s face, shoulders, and reflection. Include a clean horizon line where the snowy ground meets the reflected surface.
Step 3: Masking Highlights
- Apply masking fluid with a small brush to areas you want to preserve as white, such as highlights on the face, edges of snowflakes, and icy sparkles.
Step 4: Painting the Background (Sky and Snow)
- Use the flat wash brush to wet the sky area with clean water.
- Apply a gradient of cobalt blue and ultramarine, fading into a light grey near the horizon.
- For the snowy ground, use diluted grey and ultramarine, leaving areas of white for highlights.
Step 5: Painting the Subject
- Use a size 6 round brush to layer skin tones using a mix of burnt sienna and ultramarine for shadows.
- Add details to the face and clothing with smaller brushes (sizes 2 and 6).
- Keep the strokes soft and blended for a realistic effect.
Step 6: Creating the Reflection
- Wet the reflected area with clean water.
- Use the same colors as the portrait but slightly diluted and blurred to mimic the reflective quality of ice.
- Add subtle ripples using a small brush and horizontal strokes of light grey.
Step 7: Adding Snowy Textures
- While the snow areas are still damp, sprinkle kosher salt. Allow it to dry completely before gently brushing off the salt to reveal organic textures.
- Add fine details of snowflakes around the subject using white gouache.
Step 8: Enhancing the Reflection and Details
- Use a clean, damp brush to soften the edges of the reflection.
- Add crisp details to the subject’s face and clothing, emphasizing highlights.
Step 9: Final Touches
- Remove the masking fluid to reveal preserved highlights.
- Use white gouache to flick snowflakes over the scene with a toothbrush or fine brush.
Tips for Success:
- Blending: Work quickly when blending colors to prevent harsh edges.
- Reflections: Keep the reflection slightly blurred and less detailed than the subject for realism.
- Snow: Use layers to build depth in snowy textures.