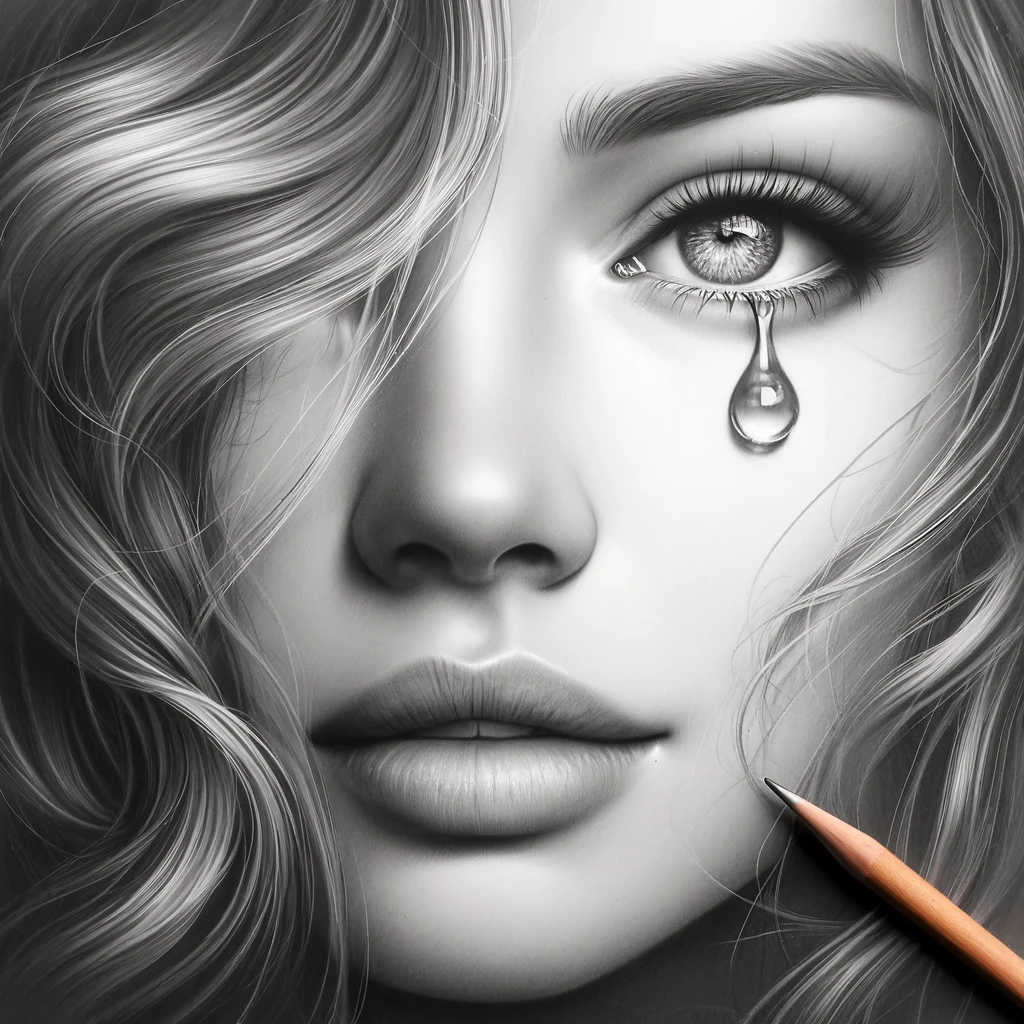
Creating a realistic eye drawing with tears adds an emotional and dramatic touch to your artwork. Mastering this skill requires attention to detail, shading techniques, and an understanding of light reflections. Whether you’re a beginner or an advanced artist, this step-by-step guide will help you achieve a lifelike tearful eye drawing with depth and expression.
(This blog contains affiliate links, meaning I make a small commission at no extra cost to you.)
Essential Tools for Drawing a Realistic Eye
Before getting started, ensure you have the right tools to create realistic shading and depth:
✔ Graphite Pencils (2H-8B) – For fine details and soft shading.
✔ Mechanical Pencil – Ideal for precise lines and tiny details.
✔ Blending Stumps & Tissues – Smooths shading for realistic effects.
✔ Kneaded & Precision Erasers – Perfect for lifting highlights and refining edges.
✔ Fine-Tip White Gel Pen – Adds reflections in the tears for a glossy effect.
🛒 Shop the best drawing tools here
Step-by-Step Guide to Drawing a Realistic Eye with Tears
Step 1: Sketching the Basic Eye Shape
✏️ Lightly outline the eye shape using an H or 2H pencil.
🔍 Ensure the proportions are correct, including the placement of the iris, pupil, and eyelids.
📐 Use reference photos to achieve accuracy in positioning.
Step 2: Adding the Iris and Pupil
👁️ Shade the pupil using a soft graphite pencil (4B-6B) for depth.
🎨 Create radial strokes in the iris to mimic natural eye textures.
✨ Leave a small highlight in the pupil for a lifelike reflection.
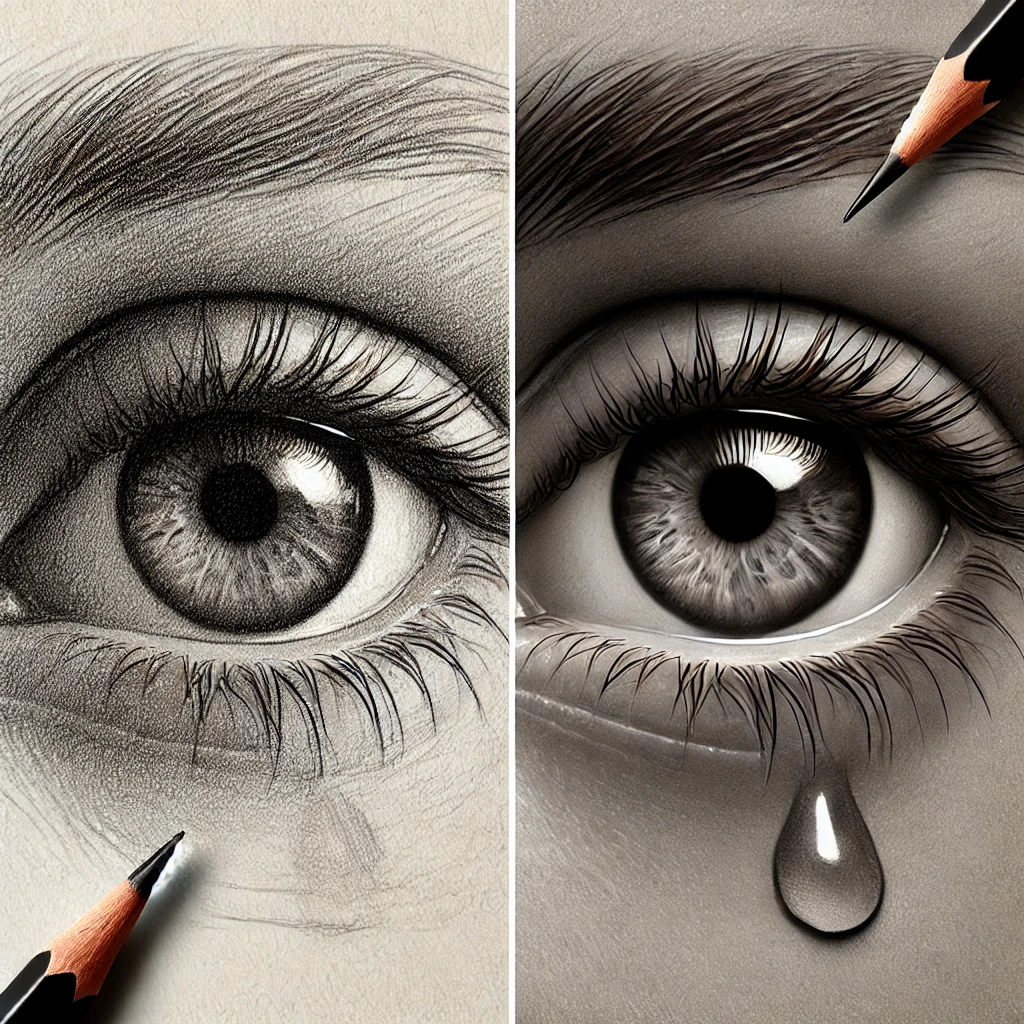
Step 3: Building Depth with Shading
🖌️ Use a blending stump to soften the shading in the sclera (white of the eye).
💡 Add light shading under the eyelids to enhance depth.
✍️ Darken the lash line and tear ducts for contrast.
Step 4: Drawing Realistic Eyelashes
🎯 Use short, flicking strokes for natural-looking lashes.
🖋️ Vary the thickness and curve to mimic real eyelashes.
🛒 Get precision mechanical pencils for fine details
Step 5: Creating a Realistic Tear Effect
💧 Sketch the tear shape with light guidelines, ensuring natural drips.
🌗 Shade inside the tear with a soft 2B-4B pencil for transparency.
✨ Use a kneaded eraser to lift highlights for a wet look.
💎 Add white gel pen highlights to create reflections for a glossy tear effect.
Final Touches for a Lifelike Eye Drawing
✔ Refine shading around the eye for added realism.
✔ Enhance reflections by layering highlights strategically.
✔ Deepen shadows to create more contrast and depth.
✔ Use fixative spray to protect your drawing from smudging.
🛒 Shop artist-quality fixative sprays here
Learn to draw realistic tears with precision! Watch the tutorial here and bring emotion to your sketches! ✏️💧👁️
Final Thoughts: Master the Art of Emotional Sketching
Adding tears to a realistic eye drawing requires skillful shading and careful highlight placement. By following these steps and practicing regularly, you can bring emotions to life through your artwork.
🎨 Upgrade your art supplies today! Check out our recommended drawing tools here and take your sketches to the next level!
📌 Love this guide? Save it to your Pinterest board and inspire others!