This post contains affiliate links. If you buy through them, I may earn a small commission at no extra cost to you.
Hands are the part of a drawing most artists hide in a pocket or behind a back. Here’s how to stop hiding them.
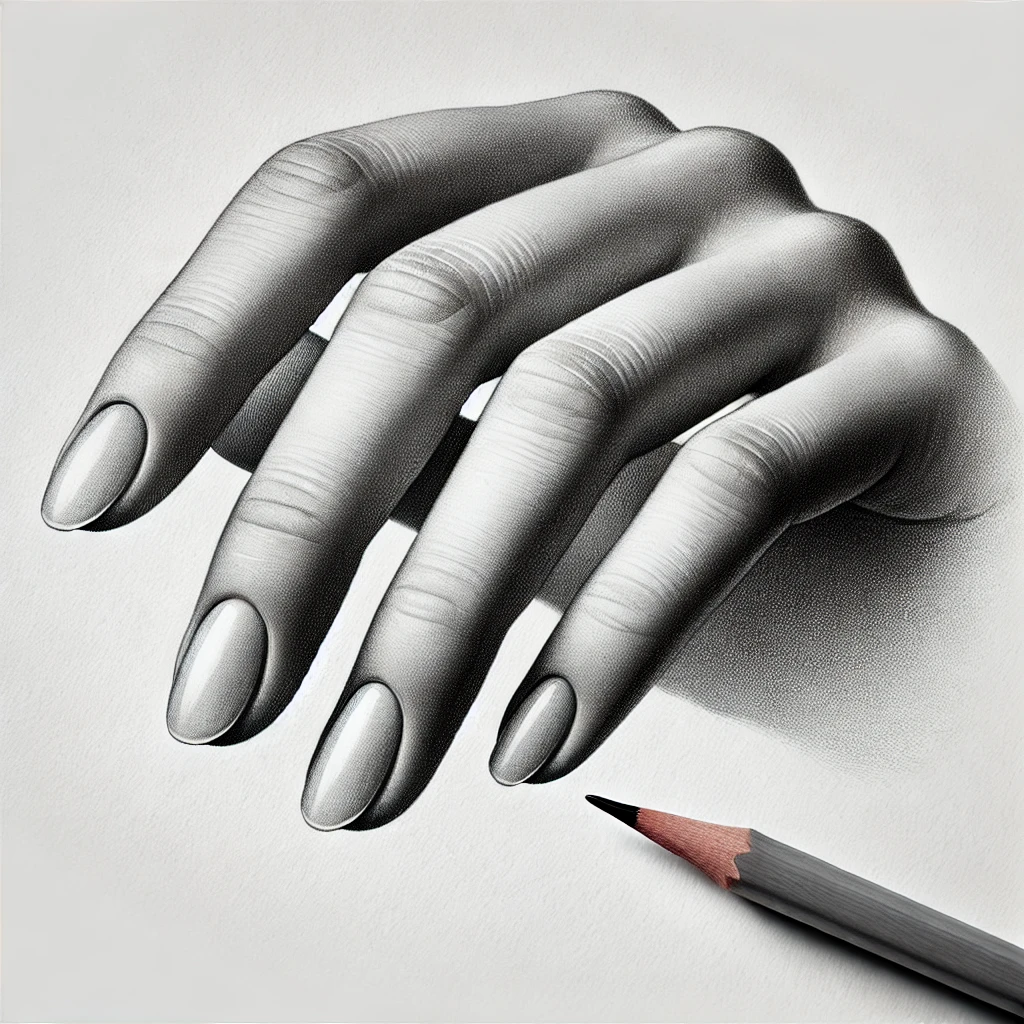
My take: hands look wrong when we draw fingers first. We get excited about the details, draw five careful fingers, and then discover they don’t attach to the palm in a believable way. Start with the big mitten shape, add the fingers as simple segments, and the details fall into place.
The best part? You carry the perfect model with you everywhere. Your non-drawing hand will pose for you any time, for free, for as long as you like.
If you only do one thing: draw the palm and fingers as one mitten shape before you separate a single finger. It locks in size and gesture so the fingers have somewhere to go.
What you’ll need
You don’t need much, and you probably have most of it.
- Graphite pencils from 2H to 8B. A set like the Faber-Castell graphite pencils covers light construction lines through deep shadows. If you want everything in one box, a complete graphite drawing set adds sticks and blending tools.
- A mechanical pencil (0.5 mm, HB) for crisp edges around fingernails and creases.
- Blending stumps. Prismacolor blending stumps soften skin tones without smearing your darks.
- Erasers. A kneaded eraser for lifting highlights, the Tombow Mono Zero eraser for tiny knuckle highlights, and a Tombow soft eraser for clean-up.
- Smooth drawing paper. A Strathmore sketchbook works great for practice studies.
Curious which stumps blend skin most smoothly? I compared them in The Top 3 Blending Stumps.
The 4-step method at a glance
Each step below builds on the one before. Resist the urge to skip ahead.
Step 1: Block in the mitten
Lightly, with a 2H pencil, draw the palm as a slightly squared shape, a bit taller than it is wide. Then draw one simple shape for all four fingers together, like a mitten. Add the thumb as its own wedge coming off the side, low on the palm.
Keep your lines so light they almost disappear. You’ll erase most of them.
Check the gesture now. Is the hand relaxed, reaching, gripping? The mitten should already show it. If it doesn’t, adjust the mitten. It’s much easier to fix one shape than five fingers.
Step 2: Divide the fingers into segments
Each finger has three segments, and the thumb shows two plus a fleshy base. Think of them as cylinders stacked end to end, each a little shorter than the one before.
Here’s the most useful thing to notice: the knuckles form an arc, not a straight line. Hold your hand up flat and look at where the fingers meet the palm. The middle knuckle sits highest and the others curve down on either side. The same arc repeats at each row of joints.
Hand proportion cheat sheet
Every hand is different, so treat these as approximate starting points, then check against your own hand.
| Feature | Approximate guide |
|---|---|
| Longest finger | The middle finger |
| Palm length | Roughly equal to the middle finger |
| Finger segments | Each step down a little toward the tip |
| Index and ring | Close in length, either may be longer |
| Pinky tip | Near the ring finger’s top joint |
| Thumb tip | Held alongside the hand, lands near the index finger’s base knuckle (varies a lot) |
| Whole hand | Roughly chin to hairline on the face |
These are drawing guides, not rules. Hands vary a lot from person to person, so your reference always wins.
Use your pencil to measure. Hold it at arm’s length, line the tip up with the top of the middle finger, and slide your thumb to the knuckle. Then compare that length with the palm.
Step 3: Refine the contours
Now switch to an HB or your mechanical pencil and draw the real outline over your segments.
- Fingers taper. They’re widest at the base and slimmer at the tip, with a slight bulge at each joint.
- Pads are soft. The underside of each segment is rounded; the top is flatter.
- Creases sit at the joints. Look for two or three short lines on the palm side of each joint, plus the bigger lines across the palm.
- Nails sit on top. A fingernail curves around the finger, so it looks narrower when you see the finger from the side.
Lift away your construction lines with the kneaded eraser as you go.
Know the three zones of the hand
Thinking in zones helps you shade too. Each zone turns in its own direction, so each catches the light differently.
Step 4: Shade with one light source
Pick one light direction and stick with it. Mixed light is the fastest way to make a hand look flat.
- Lay in the shadow shapes with a 2B. Fingers on the shadow side, the area under the thumb, and the gaps between fingers.
- Hatch around the form. Curve your strokes so they wrap around each finger like rings, not straight down its length.
- Build darks slowly with 4B to 8B in the deepest spots: between fingers, under the thumb pad, in the palm creases.
- Blend gently with a stump. Skin is smooth, but over-blending makes it look like plastic. Leave a little texture.
- Lift highlights on the knuckles, fingertips and nails with the Tombow Mono Zero or a pointed piece of kneaded eraser.
For more on building value step by step, see my guide to shading techniques for artists.
If you learn better by watching, this tutorial walks through the process:
Common mistakes (and quick fixes)
| Mistake | Quick fix |
|---|---|
| Fingers all the same length | Check the knuckle arc |
| Sausage fingers | Add taper and joint bulges |
| Thumb attached too high | Start it low, near the wrist |
| Flat, pasted-on shading | Wrap hatching around each finger |
| Hard outline everywhere | Lose some edges on the light side |
The thumb mistake is the most common one I see. The thumb’s base joint sits much lower than most people expect, close to the wrist, which is why it can swing across the palm.
Poses to practice
Start simple and add difficulty as you go.
- Flat hand, palm down. The easiest way to learn the knuckle arc.
- Relaxed hand resting on a table. Fingers curl naturally and overlap a little.
- Loose fist. Great practice for foreshortening.
- Hand holding a pencil or cup. Objects give the fingers something to wrap around.
- Pointing hand. One finger extended toward you is a classic foreshortening challenge.
Draw your own non-drawing hand. When a pose gets tiring, take a quick phone photo of it, or set up a small mirror to see angles you can’t see directly.
For hands in full figures, my collection of female poses for artists has plenty of reference ideas.
Your 7-day hands practice plan
About 20 minutes a day. Pin this table so you can come back to it.
| Day | Focus | Time |
|---|---|---|
| 1 | 10 mittens, gesture only | 15 min |
| 2 | Knuckle arcs, flat hand | 20 min |
| 3 | Fingers as segments | 20 min |
| 4 | Thumb in 5 positions | 20 min |
| 5 | Contours and creases | 25 min |
| 6 | One fully shaded hand | 30 min |
| 7 | Hand holding an object | 30 min |
On day 7, compare your drawing with your day 1 mittens. That jump is the payoff for a week of simple shapes.
Investment pieces worth it
You can draw beautiful hands with a few pencils. If you’re ready to upgrade, here’s what makes a real difference.
Professional sketchbook ($$). Heavier, smoother paper takes layered graphite and erasing without pilling. Worth it for finished studies you want to keep. Skip it for daily drills; cheaper paper is fine for mittens and knuckle arcs.
Faber-Castell Pitt Graphite Matte set (around $20). Matte graphite cuts the shiny glare that dark pencil can get, which helps deep shadows between fingers read as rich darks. Worth it if your darks look metallic. Skip it if you mostly sketch lightly.
Daylight Company Lumi Task Lamp (around $195). A steady, high-CRI lamp gives you one clear light source on your model hand, which makes shadow shapes far easier to see. Over 3 years of 4 sessions a week, that’s about $0.31 a session. Worth it if you draw in the evening. Skip it if you have good window light.
The takeaway
Hands get easier the moment you stop drawing fingers one at a time. Block in the mitten, divide it into segments along the knuckle arc, refine the contours, then shade with one light. Do that for a week and your hands will stop hiding behind backs.
Which part of the hand gives you the most trouble: the thumb, the knuckles, or the shading? Tell me in the comments.
Keep going: