This post contains affiliate links. If you buy through them, I may earn a small commission at no extra cost to you.
Most charcoal drawings that “didn’t work” were never a talent problem. They were a toolkit problem: the wrong paper, no eraser that lifts, and a finger doing the blending.
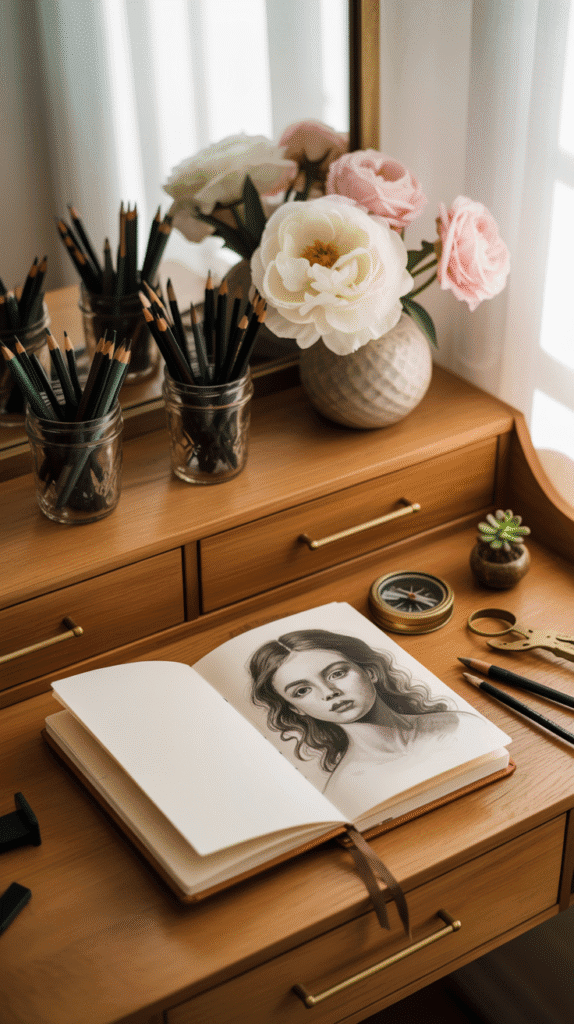
Here’s my take: buy charcoal tools in stages, in the order your drawings ask for them. Pencils and paper first, then the tools that control tone, then the studio pieces that make long sessions comfortable. Buying everything at once is how you end up with a $90 drawer of stuff you never touch.
If you want to know what vine, compressed and powdered charcoal actually are, start with the best charcoal for drawing, every type explained. This post is the shopping list: what to buy, in what order, and what you can skip.
Quick answer: if you only buy one kit
Start with a charcoal pencil kit, an 18×24 pad of real charcoal paper, a kneaded eraser and a pack of blending stumps. That’s roughly $50 and covers nearly everything a beginner draws. Add everything else only when a drawing makes you wish you had it.
The buying order at a glance
The top of the pyramid is where your money matters most. A $7 pencil kit on good paper will outperform a $35 set on printer paper every single time.
Your toolkit by stage
| Stage | What’s in it | About | Buy it when |
|---|---|---|---|
| Starter | Pencil kit, 18×24 pad, kneaded eraser, stumps | $50 | You’re trying charcoal |
| Serious | Pro pencil set, Stonehenge, toned paper, fixative | $100 more | You draw weekly |
| Studio | Daylight lamp, tilt table, air purifier, flat file | $190 to $735 each | Charcoal is your main medium |
Charcoal pencils: start here
Pencils are the cleanest, most controllable way into charcoal. They’re compressed charcoal in a wood casing, so you get deep darks with pencil-level precision and far less dust than sticks.
Best starter pencils
General’s kit is the one I recommend first. It gives you a few grades of charcoal pencil plus the basics to try them, for about the price of a sandwich.

Royal & Langnickel’s set is another budget-friendly way to test several grades before you commit to a favorite brand.

Best pencils once you’re hooked
Faber-Castell Pitt charcoal pencils are smooth, consistent and sharpen to a clean point. The 24-piece set gives you room to experiment.

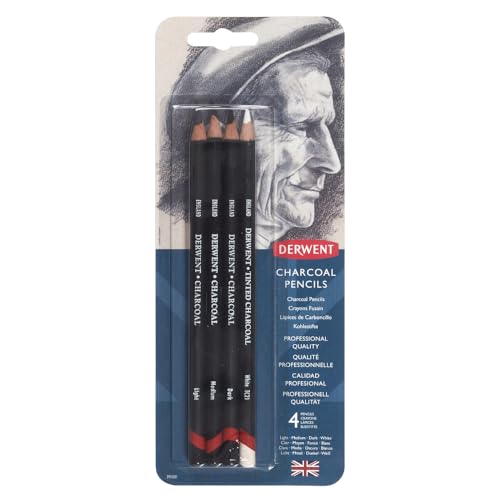
Derwent’s charcoal pencils are a lovely middle option, with rich darks and a slightly softer feel on the paper.
Conté à Paris Pierre Noire is a velvety black that many portrait artists love. It’s a blended black and not pure charcoal, so it behaves a little differently from your Pitt or General’s pencils. Test it on a corner before you use it in a finished piece.

For a deeper pencil-by-pencil comparison, see the best charcoal pencils for artists.
Paper: the tool most beginners skip
Charcoal needs tooth, the little hills and valleys that grab and hold the pigment. Smooth sketch paper lets charcoal slide around and turn muddy fast.
- Strathmore 400 charcoal paper, 18×24: a classic laid texture that holds layers well. Big enough to draw from the shoulder.
- Canson Mi-Teintes: toned pastel paper, so you can draw darks in charcoal and pop highlights in white. One side has a pronounced honeycomb texture; the other is smoother.
- Legion Stonehenge: a soft, cotton paper that takes blending beautifully. My pick for finished pieces.

Assorted Colors, Foldover Pad, 9x12 inches, 24 Sheets (98lb/160g) - Artist Paper for Adults and Students


Paper choices go much deeper than this. See the best paper for charcoal drawings for the full breakdown.
Blending and erasing: where control lives
Blending stumps and tortillons
Stumps are tightly rolled paper sticks with points on both ends. Tortillons are smaller, hollow, and wound to a single point. Use stumps for broad tone and tortillons for tight corners like the inside of a nostril.
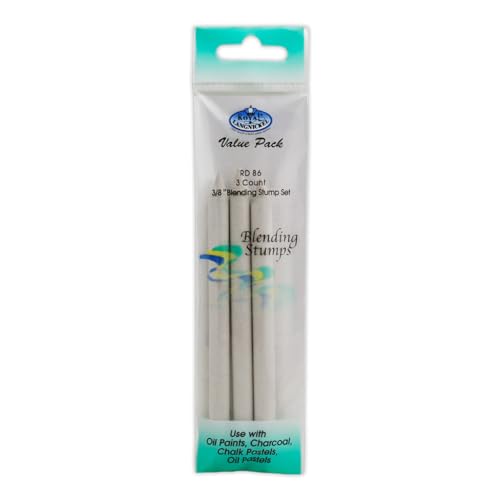
Keep one stump for light values and one for darks. A dark stump dragged through a light area will gray it out instantly.
- blending stumps
- tortillons
- a chamois for big areas
- a soft brush
- your fingertip
- a tissue on fine detail
- a dirty dark stump on light skin
Fingers feel natural, but skin oils sink into the paper and leave patchy, muddy tones that won’t take another layer. For more, see how to blend charcoal like a pro.
A kneaded eraser
If you buy one tool beyond pencils and paper, make it this. A kneaded eraser lifts charcoal off the paper instead of grinding it in, and you can shape it to a point to pull out highlights in eyes or hair. It’s the closest thing charcoal has to a paintbrush for light.
Want to choose the right one and keep it working for months? Read my full kneaded eraser guide.
Small tools that punch above their price
- Sandpaper pad: a few swipes reshape a stick or pencil to a chisel or fine point. A few dollars.
- Workable fixative: sets a layer so you can keep drawing on top. Spray outdoors or in a well-ventilated room, in thin passes, about 12 inches from the paper.
- Soft dusting brush: sweeps loose charcoal off the page without smearing it.
- Drawing glove or a scrap sheet: keeps your hand from dragging through finished areas.
Here’s what each one saves you from:
| Tool | Skip it and… | Cost |
|---|---|---|
| Kneaded eraser | Highlights turn gray and smudgy | $ |
| Blending stumps | Fingers leave muddy, oily patches | $ |
| Sandpaper pad | Dull points, blunt details | $ |
| Workable fixative | Layers smear as you build them | $$ |
| Dusting brush | You blow on the page and smudge it | $ |
A charcoal session, start to finish
Tools make the most sense when you see them in order. Here’s how a typical drawing moves through your kit:
A few habits that keep that session clean:
- Work light first. Charcoal is easy to add and harder to remove. Build in three or four thin layers.
- Mix grades. Hard or medium for early layers, soft for the final darks.
- Rest your hand on scrap paper. Your palm is a smudge machine.
- Stop blending sooner than you think. Over-blended drawings look flat. Leave some texture.
- Clean up with a damp cloth. Wipe your table instead of blowing the dust around the room.
Stand back 6 feet every 10 to 15 minutes. You’ll catch value problems from across the room that you’d never see up close.
Investment pieces worth it
Once charcoal is your main medium and you’re drawing several times a week, these are the upgrades that change how the work feels. None of them are required. All of them make long sessions easier.
A true daylight lamp
Charcoal is all about value, and bad light lies about value. A high-CRI daylight lamp shows you the real difference between a mid gray and a dark gray.
- Daylight Artist Studio Lamp, 95+ CRI, about $275 at the time of writing.
Worth it for: anyone who draws in the evening or in a room without good window light. $275 over 3 years of twice-weekly sessions is about 90 cents a session. Skip it if: you draw by a north-facing window during the day. A 5000K, 90+ CRI bulb in a clamp lamp gets you most of the way.
More on studio lighting in the best lighting for art studios.
An adjustable drafting table
On a tilted surface, loose dust falls away instead of piling up under your hand, and you see the drawing without distortion. Your neck will thank you too.
Worth it for: artists working at 18×24 or bigger who like to switch between sitting and standing. Skip it if: you mostly work in a sketchbook. A tabletop easel gives you tilt for a fraction of the price.
An air purifier
Sticks, powder and sandpaper pads all make fine dust that settles on everything. A HEPA purifier near your drawing spot catches a lot of it.
- Levoit Core 400S-P air purifier, about $190.
Worth it for: small rooms, frequent stick or powder use, anyone sharing the space. Skip it if: you draw almost only with pencils, which shed much less.
A flat file for finished drawings
Charcoal drawings smudge when they’re stacked, rolled or slid in and out of a portfolio. A flat file keeps them flat, separated and safe.
- AdirOffice Flat File Cabinet, 5-drawer, about $735.
Worth it for: artists building a body of work at 18×24 and larger. Skip it if: you have fewer than 20 finished pieces. Interleave them with glassine in a flat portfolio for now.
Starter kit vs serious kit, side by side
| Item | Starter pick | Serious pick |
|---|---|---|
| Pencils | General’s kit | Faber-Castell Pitt 24 |
| Paper | Strathmore 400 | Stonehenge plus Mi-Teintes |
| Blending | Stumps | Stumps, tortillons, chamois |
| Extras | Kneaded eraser | Fixative, sandpaper, brush |
The takeaway
The best charcoal drawing tools are the ones your current drawings are asking for. Start with pencils, real charcoal paper, a kneaded eraser and stumps, then add small tools as you need them. Save the lamp, table, purifier and flat file for when charcoal becomes a weekly habit.
Which tool made the biggest difference in your charcoal drawings? Tell me in the comments.
Save this toolkit guide for your next art supply order.
[…] The Best Charcoal Drawing Tools for Artists: Pencils, Paper & Essentials You’ll Love […]